


Troubleshooting Low Water Pressure Isolated to a Single Bathroom Sink
See what causes a sudden drop in flow when troubleshooting low water pressure isolated to a single bathroom sink. Learn when to check aerators or call a pro.
Responsible Master Plumber · TX Master Plumber License M-41984
Experiencing a Sudden Drop in Sink Water Pressure?
Are you turning on the faucet only to be met with a frustrating trickle, even though the shower and kitchen sink are working perfectly? Troubleshooting low water pressure isolated to a single bathroom sink is a common challenge for homeowners, especially when community water demands spike during late summer. A sudden drop from a single fixture is a highly specific, concrete problem. It disrupts your morning routine and immediately raises concerns about hidden pipe leaks or expensive plumbing failures.
If you are dealing with persistent fixture issues, learn more about our bathroom plumbing solutions or schedule bathroom plumbing services in Taylor today.
It is important to distinguish between whole-house municipal water fluctuations and an isolated fixture issue. When the pressure drops across the entire house, the root cause often lies at the main water line, the municipal supply, or a failing pressure reducing valve. However, when the problem is isolated to just one sink, the primary decision point for homeowners is determining whether this low pressure can be fixed with basic, surface-level troubleshooting or if it indicates a failing internal valve that requires a licensed professional. By following a structured, process-of-elimination approach, you can safely diagnose the root cause without risking accidental damage to your home's plumbing system. Let's break down the exact steps to isolate and identify what is restricting your water flow.
Step 1: Confirming the Low Pressure is Truly Isolated
Before taking anything apart or reaching for a wrench, you need to verify the exact scope of the problem. A drop in water pressure can sometimes be deceptive, especially during late summer when neighborhood irrigation systems and high community water demand can cause temporary whole-house pressure fluctuations. To ensure you are actually dealing with an isolated issue rather than a systemic one, follow these diagnostic steps to narrow down the culprit.
- Test adjacent fixtures: Turn on the shower, bathtub, or another sink in the exact same bathroom. If these fixtures have strong, normal water flow, you can confidently rule out a main line issue or a whole-house pressure drop. The problem is definitively localized to that specific sink basin.
- Check hot and cold lines independently: Turn on just the cold water handle, observe the flow, then turn it off completely and test just the hot water handle. If only one side has low pressure, the blockage is isolated to that specific supply line or the corresponding side of the faucet cartridge. If both hot and cold lines are equally affected, the focus shifts to the immediate hardware where the water mixes and exits.
- Monitor the timing of the flow: Does the water start strong for a split second and then immediately drop to a trickle? This behavior often indicates a pressure issue rather than a volume issue, pointing toward a failing internal valve or a severely kinked line that collapses under the vacuum of flowing water.
Understanding these distinct symptoms helps prevent unnecessary panic. If you frequently notice issues across multiple fixtures, you might be dealing with one of the many common bathroom sink problems that require broader, system-wide diagnostics. But if both hot and cold lines are equally affected at a single fixture, the culprit is almost always located right at the sink itself.
| Observed Symptom | Likely Location of the Blockage |
|---|---|
| Both hot and cold water trickle from one sink | The aerator, the mixing cartridge, or the main spout |
| Only hot water trickles from one sink | Hot water shut-off valve, hot supply line, or hot side of cartridge |
| All fixtures in the bathroom have low pressure | Bathroom branch line or localized pipe corrosion |
| The entire house has low pressure | Main water line, municipal supply, or pressure reducing valve |
The Leading Culprit: Mineral Scale Buildup
Hard water affects nearly 85% of U.S. homes, bringing high levels of dissolved minerals directly into household plumbing systems. In Central Texas, municipal and well water sources are notoriously hard, containing exceptionally high levels of calcium and magnesium. These dissolved minerals are the leading cause of isolated water pressure drops in residential bathrooms. Over time, as water flows through your fixtures, these minerals precipitate out of the water and physically bind to the internal components of your plumbing.
The most vulnerable component in this scenario is the standard bathroom faucet aerator. The aerator is the small, threaded metal attachment located at the very tip of your faucet spout. It contains a fine mesh screen designed to mix air into the water stream, reducing splashing, shaping the water column, and conserving water usage. However, that same fine mesh acts as a highly effective trap for mineral scale and loose sediment traveling through your pipes.
As calcium and magnesium build up on this screen, they slowly choke off the water flow. A heavily clogged screen can severely restrict output, reducing a standard 1.5 to 2.2 gallons per minute (GPM) flow rate down to a mere trickle. This physical blockage is the most common reason a single sink will suddenly underperform while the rest of the house remains completely unaffected. Because the scale buildup happens gradually layer by layer, you might not notice the pressure drop until a larger piece of sediment finally blocks the remaining open pores in the mesh screen, causing what appears to be a sudden failure.
How to Safely Inspect and Clean Your Fixture
At Plumbing Outfitters, we believe in an honest diagnostic approach. We want to empower homeowners with safe, surface-level DIY cleaning steps first, before ever recommending a paid service call. Cleaning a standard bathroom faucet aerator is straightforward, requires no specialized plumbing tools, and poses very little risk to your plumbing system if done carefully.
- Plug the sink drain completely: Before you start, ensure the sink drain is fully plugged or covered with a thick towel. The internal components of an aerator are very small, and dropping a crucial piece down the drain turns a simple five-minute cleaning task into a much bigger, more frustrating headache.
- Remove the aerator tip: Carefully unscrew the tip of the faucet spout. In most cases, you can do this by hand by turning it counter-clockwise. If it is stuck due to heavy mineral buildup, wrap a small rubber jar opener or a rag around the tip to protect the finish, and gently turn it with a wrench or pliers. Never apply excessive force, as you can crush the thin metal housing.
- Disassemble the internal screen: Once removed, carefully push the internal mesh screen, the flow restrictor, and the rubber gasket out of the metal outer housing. Pay close attention to the order and orientation in which the parts sit so you can reassemble them correctly later.
- Soak the parts in white vinegar: Place the mesh screen and any heavily scaled components into a small bowl of plain white vinegar. The natural acidity of the vinegar will dissolve the calcium and magnesium deposits safely without damaging the plastic or metal. Let it soak for 30 to 60 minutes, then scrub gently with an old toothbrush to remove any remaining stubborn scale.
- Rinse and reassemble: Rinse all parts thoroughly under another working faucet to wash away the dissolved minerals and vinegar. Reassemble the components in the correct order and hand-tighten the aerator back onto the faucet spout. Turn the water on to test the flow.
In the vast majority of cases, this simple cleaning process will immediately clear the blockage and restore your sink's water pressure to its normal, strong flow rate.
Checking Under-Sink Supply Lines and Shut-Off Valves
If cleaning the standard bathroom faucet aerator did not resolve the low pressure, the next step in your process of elimination takes you beneath the sink. The issue may be related to how the water is physically traveling from the wall valves up to the base of the faucet.
One homeowner reached out to us during the spring after a DIY installation attempt left their new bathroom sink with barely any water pressure. Upon inspection, the problem wasn't a defective faucet or a hidden leak, but rather a simple mistake made during the installation process beneath the sink where a supply line had become twisted. The issue was quickly corrected, saving the customer from an embarrassing and frustrating situation. To avoid similar pitfalls and rule out surface-level flow restrictions, perform these safe visual checks:
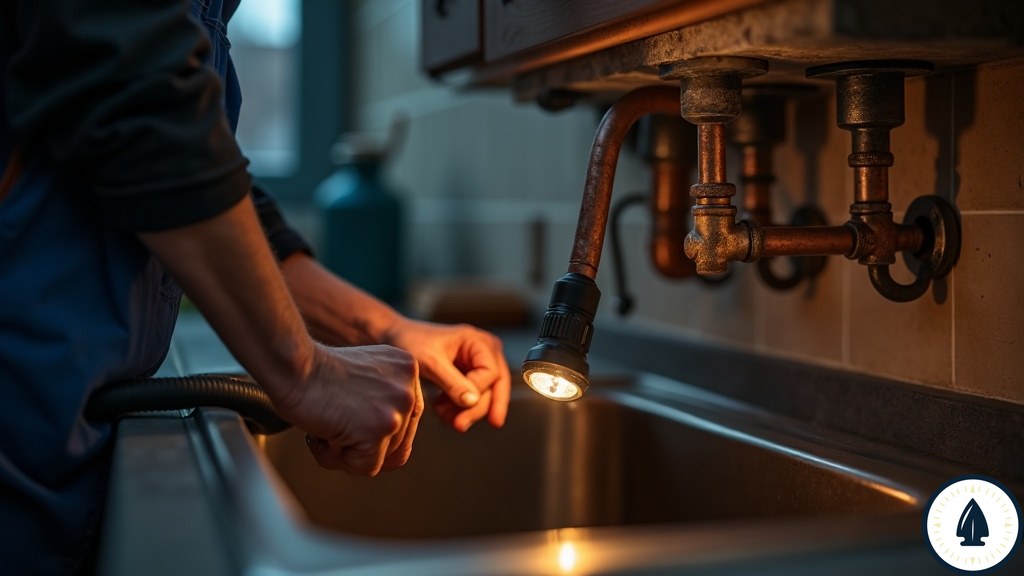
- Clear the cabinet completely: Remove all cleaning supplies, extra toilet paper, and storage bins from under the sink. You need a clear, well-lit view of the plumbing components against the wall and the underside of the counter.
- Inspect the flexible supply lines: Look closely at the braided metallic or plastic hoses connecting the wall valves to the underside of the faucet. Visually inspect these lines for any severe kinks, sharp bends, or heavy crimping. If a heavy bottle of cleaner was shoved against a line, or if the line was twisted during a DIY installation, it might be folded over, physically choking off the water flow.
- Verify the shut-off valves are fully open: Locate the two angle stops (shut-off valves) protruding from the wall. Ensure both the hot and cold valves are turned fully counter-clockwise to the "open" position. Sometimes, these valves get bumped and partially closed by items stored under the sink, drastically reducing the water volume reaching the faucet.
- Exercise extreme caution with older valves: Never force a stuck shut-off valve. Older, heavily calcified multi-turn valves can easily snap, sheer off, or begin leaking from the packing nut if forced with a wrench. If the valve refuses to turn by hand, leave it alone and do not attempt to force it open.


When to Stop DIYing: Faulty Cartridges and Internal Valve Issues
Establishing clear safety boundaries on what you should and shouldn't attempt to repair yourself is crucial for protecting your home from accidental water damage. If the surface-level components are clean, the standard bathroom faucet aerator is completely clear, and the flexible supply lines are straight, the issue likely resides much deeper inside the faucet cartridge or the wall valves themselves.
Faucet cartridges are the complex internal mechanisms hidden beneath the handles that control the physical flow and temperature mixing of the water. When these cartridges fail mechanically, or when their internal rubber seals degrade and block the internal pathways, they severely restrict water flow. Replacing a cartridge requires specialized disassembly of the faucet handle, careful removal of delicate retaining clips, and precise installation of brand-specific replacement parts. If you notice the faucet handle is stiff to turn, squeaks, or drips when turned off alongside the low pressure, a failing cartridge is highly likely.
Similarly, if an under-sink shut-off valve has failed internally, the internal washer can break loose and block the water path entirely. Replacing shut-off valves requires turning off the main water supply to the entire house, cutting or unthreading pressurized lines, and installing new angle stops securely to prevent catastrophic leaks inside the wall.
These deeper repairs cross the line from safe DIY troubleshooting to requiring a licensed professional. Attempting to force a stuck wall valve or dismantle a complex mixing cartridge without the proper tools and training can result in broken pipes and immediate flooding. If you have reached this point in the process of elimination, it is time to rely on professional bathroom plumbing repairs in Round Rock to safely restore your system.
Frequently Asked Questions About Localized Low Water Pressure
Why is water pressure low in only one bathroom sink?
This is usually caused by a localized physical blockage, most commonly mineral scale buildup in the tip of the faucet. When dissolved minerals like calcium build up inside the standard bathroom faucet aerator, they physically restrict the flow of water exiting the spout. It can also be caused by a kinked supply line under that specific sink or a partially closed shut-off valve. By checking these surface-level components first, you can often isolate and resolve the issue quickly without needing a complex repair.
Can a bad cartridge cause low water pressure?
Yes, if the internal cartridge becomes fouled with debris or fails mechanically, it will severely restrict water flow. The cartridge is the internal engine of the faucet, responsible for controlling the volume and temperature of the water. When the internal pathways become blocked by sediment or broken rubber seals, the pressure drops dramatically. Because cartridges are complex and highly brand-specific, they require professional disassembly to replace safely.
How do I clean a standard bathroom faucet aerator?
Unscrew the tip of the faucet, remove the internal mesh screen, soak the components in white vinegar to dissolve the minerals, rinse thoroughly, and reattach. Start by plugging the sink drain so you don't lose any small parts down the pipes. If the tip is stuck, use a towel and a wrench to gently turn it without scratching the metal finish. A 30-minute soak in plain vinegar is usually enough to break down even heavy calcium deposits safely.
Does low pressure in one sink mean I have a hidden pipe leak?
Rarely. While severe leaks can reduce overall system pressure, a leak large enough to drop pressure dramatically in just one sink would usually cause visible water damage very quickly. Localized pressure drops are almost always related to physical blockages in the fixture itself, not holes in the piping inside the walls. If you don't see water pooling under the sink or water stains on the drywall, a leak is highly unlikely.
Why is only the hot water pressure low in my sink?
This indicates the blockage is strictly isolated to the hot water supply line, the hot water side of the mixing cartridge, or a partially closed hot water shut-off valve. Because hot water causes minerals to precipitate out of solution faster than cold water, scale buildup often happens more rapidly on the hot side of the plumbing system. Checking the hot water angle stop under the sink is the best first step to diagnosing this specific symptom.
Get Expert Help for Stubborn Sink Pressure Issues
Having a clear, safe troubleshooting checklist that isolates the most common causes of low pressure provides peace of mind. By checking your standard bathroom faucet aerator and visually inspecting the supply lines, you can confidently rule out the simple fixes and restore flow on your own. However, if cleaning the surface components and checking the lines didn't restore the water volume, the issue requires deeper diagnostics. Especially in late summer when you rely heavily on your home's plumbing to keep up with daily routines, you shouldn't have to live with a trickling faucet.
If your process of elimination points to a failing internal cartridge or a stuck wall valve, don't risk a DIY disaster by forcing pressurized components. Schedule an inspection with a local expert to handle complex replacements safely and effectively. To get your system flowing perfectly again without the stress, reach out to our team for professional bathroom plumbing services in Taylor.
Ready to find your way out of plumbing trouble?
Call the Outfitters or request service online — a real team member will guide you through the next steps. No dispatch fee, free estimates, same-day service across Taylor, TX and beyond.